Thursday, February 20, 2014

Acoustic Part Eight -- Finish Line in Sight

The finish line is in sight, and like all other stages in this acoustic ride, preparing for finish has been an interesting experience.

I don't have a spray booth in my workshop, and I don't think I can convince my wife that the smell of lacquer in the morning would be a good thing, so off I go on the path of least resistance . . . have the guitar finished by an outside source.  Well, easier said than done.  The pros (Martin Guitars) don't mess with anything outside the confines of their company creations.  The luthier shops in Columbus and Cleveland have determined that, if they decide to take on outside work, it is costly, with the least expensive being $1,200 to spray a guitar neck and body.

The most experienced luthier in Columbus, and also the most expensive, made a comment that got me to thinking critically.  He said, "We think a person who builds a guitar should take it all the way from start to finish."  I think he is correct!  Thank you, John for motivating this cautious old guy.

So, off I ride on the research journey. After phone calls and product research, my friend Larry suggested that I consider gun stock oil.  "What," I asked him?  "I'm building a guitar, not a weapon."  That's when he explained the advantages of using TruOil.  It's easy to apply.  It's inexpensive.  It's durable (think of a rifle being banged around in the back of Bubba's 4-wheeler).  And, the final result is beautiful.

A call to Birchwood-Casey (they're the folks who manufacture TruOil) and a step-by-step tutorial from a real live person on the other end of the call, I'm expecting to receive the stuff I need (sealer and finish) today. Woohoo, I'm almost at the finish line.

However, this stage too, requires a couple special tools.  Geez, in the nearly 80 hours involved in this project, about half the time has been involved in creating special tools or waiting for glue to dry.  But, it's time well spent, or in my case, money saved for the next creation.

Since I'm hand applying the finish, I need a method by which the guitar surfaces can be accessed without difficulty and so that I don't screw up the finish.  StewMac would gladly sell me a metal gadget that will clamp nicely in my bench vice and which will turn in any direction.  A great device, but the down side is that it will cost nearly three hundred bucks.  I don't think so!

What to do?  Whoa!  For years, I've been stumbling over a bicycle stand my son thought I needed, when he wanted to get rid of it.  It adjusts in height and angle.  The top bracket is designed with a trough and clamp to hold a bike frame top tube.  It's sturdy, so why won't it work for a guitar finish stand? It will, and it does.  And, the best part is it's free.

All I needed to do to make this thing work was to create a part that would attach to the guitar body and fit the stand.  A wood dowel with piece to fit the neck joint on the guitar and a threaded metal shaft to attach to the guitar body did the trick.


It's fully adjustable and it turns easily in the clamp.


The same principle works for the neck.  After finish is applied, I can hang the neck to dry without worrying about anything getting screwed up.  I love it when a plan comes together.

Saturday, February 8, 2014

Allmosta Acoustic Guitar -- Part Seven

Remember in the last post, when I mentioned that Uncle Sam's Postal Service saved me from eco-unfriendly government regulations.

OK, let me explain.  I'm into the building process, where the next step is to cut channels and add binding to the guitar body.  Simple, right?  Not so quick.  I can cut the channels, because of the handy-dandy router table I made a while back, but adding the binding is a little more involved.

Why, you ask?  Well, it seems that our good government regulators don't think it is in good form to send certain types of plastic materials through our domestic mail system.  According to their quirky determination the plastic is unstable and susceptible to catching fire.  However, they don't seem to mind if the same product is shipped direct to my home from China.  Figure that out, if you can!  This is why I think we should allow any third grade class in the US to regulate products and process, and to send our good congressmen/women (every one of them) on a one-way adventure to inhabit Neptune -- God help the Neptunese.

How do I know this?  Because, I wanted to add tortoiseshell binding to replace the white stuff that came with the kit.  I called my friend Liz at Martin Guitar,'cause she's the product wizard there, to order the required quantity.  Sure, she said, "We have it. Are you going to pick it up?"  "No!", I replied, "I need you to ship it." 'Can't do", she said.  That's when I learned about the regulation  our Washington braintrust has developed.

Alright, enough already.  Let's get on with the fun stuff.

I received the tortoiseshell binding from China five days after I ordered it on-line.  While waiting for the binding, StewMac shipped the necessary glue for adhering plastic to wood and tape to hold the binding in place, along with abalone fret marker dots, bridge pins and strap button.

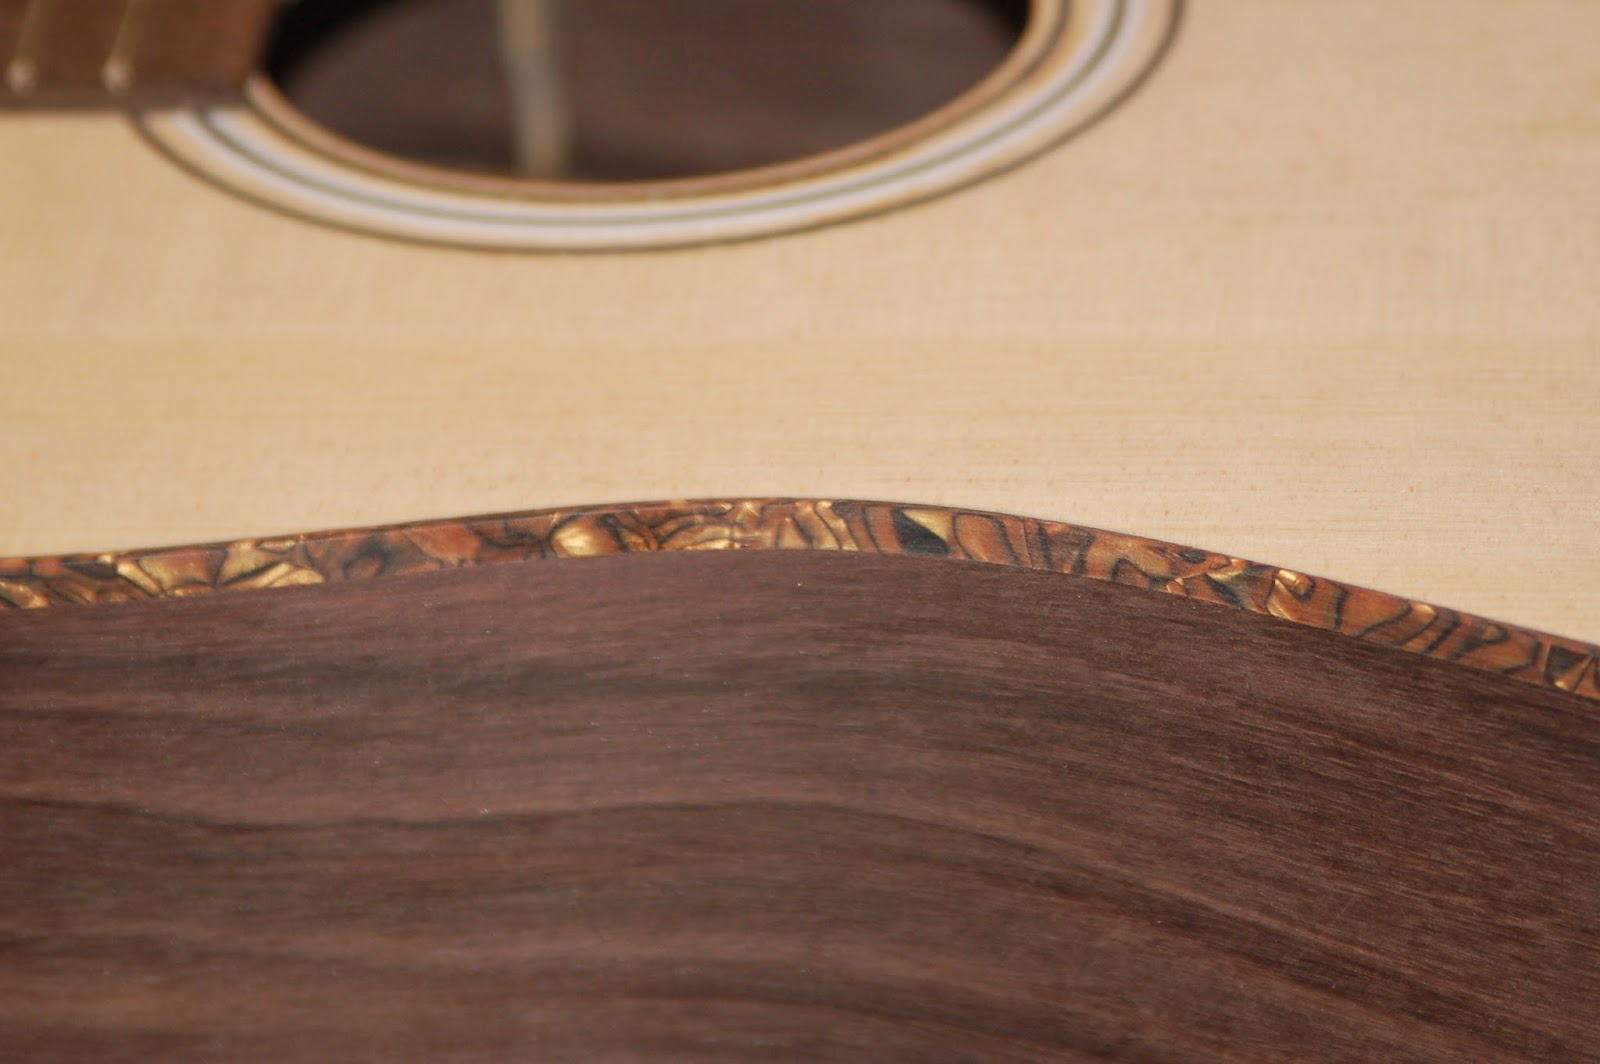
In the photo at left, you can see how the binding is glued in place and held firm with tape, while the glue dries in about two minutes.  The blue tape outlines the bridge position, which will come later.

When gluing binding to the channels it is important to make sure that a small portion of the binding is 'proud' of the surfaces. The excess will be removed with a cabinet scraper in the initial process and sanded smooth with the surface to finish the process.


I was expecting this to be a lot more difficult procedure than it turned out to be, and the result is awesome.
I really like how the color of the tortoiseshell compliments the color and grain of the rosewood sides and back.


Next in the process was to apply a heel 'cap' to the bottom surface of the heel (that portion of the neck extending down vertically on the front of the body.  The kit came with a plastic heel cap, but I don't like how it looks, so I chose to cut a piece of Ziricote to finish off the heel.

And, to finish off the backside of the guitar, where the adjoining sides created a seam, I cut a wedge-shaped piece of mahogany to match the neck.  After carefully cutting away the necessary body material, I glued the wedge in place.  (I need to point out that I did this prior to attaching the binding).

 What's left to do?


Shape the nut and saddle, and drill the tuner holes in the headstock.  The tuner holes are easy, it's just a matter of aligning them perfectly on the headstock in the positions recommended by Martin.  Again, measure twice or three times and drill once.  The nut and saddle are hand shaped from pieces of bone to correspond with the curvature of the fretboard and bridge.  If it's done correctly, the strings will follow the curvature and the string action will be just right.  I may need to do a little adjustment when the strings are attached, but I think it will be minimal.


The tape is there to mark the centerline of the neck, so I can locate the string slots.

The next phase is finish, so stay tuned.

Acoustic Progress -- Part Six

Although I like 'simple', when it comes to project detail, I've found that complications pop up regularly in the world of luthery.

Since the last post about my venture into the acoustic guitar-building arena, I've learned a lot more about the building process; how additional specialty tools aid the process; and how current eco-unfriendly government restrictions cause unplanned delays.  But, Uncle Sam's Postal Service saved the day (I'll explain this later), so I don't want to hear any complaining about how you didn't receive Aunt Willa's birthday card on time.

So, just what have I been up to?

After gluing up the body, the neck was the next order of business.  This is one of the most crucial elements in the building process (how do I know?, because my friends at Martin Guitar are so willing to share advice and information), because, if the angles of the heel and neck are not perfect nothing else will align properly and string action will be lousy.  I follow the 'measure twice (or more) and cut once' theory, always, and it works!  The angle alignments are spot-on Martin recommendations.

With the bare neck attached to the body and flush with the top, a straight-edge rule lying flush with the neck surface will ideally be 1/16" - 3/32" off the body surface at the point where the saddle will be positioned on the body. To achieve this, the heel (where the neck meets the body vertically) must be carefully shaved to fit.  And, this is only the start.  The center line of the neck must also be in alignment with the center line of the body.  So, one side of the heel may need to be shaved more than the other, while maintaining vertical integrity.

In the photo above, you'll notice a cavity running the length of the neck, which is the channel for the truss rod.

In the photo to the left, the truss rod is in place, sitting flush with the top of the neck.

The rod is shrink wrapped in a vinyl film for a reason -- to prevent the epoxy resin used to glue it in place from seeping into the rod's movable parts and rendering it useless for possible neck adjustment, down the road.

Next comes attaching the fingerboard to the neck.  This can be done in a couple ways, but the 'simple' rule applies -- press in the frets and dress them prior to gluing the board in place.  Why?  Because, it would be easy to snap off the portion of the fingerboard where it overlaps the heel, if the board were to be glued on prior to setting the frets.

Pressing the frets into the fingerboard is my method of choice.  Many luthiers recommend using a brass hammer to do this, but I don't subscribe to the notion that banging around on critical pieces is the solution to task.  So, I simply (there it is again, 'simple') cut a piece of oak scrap to the contour of the fret board; drilled a hole in the middle of the die and glued in a steel rod, to create a fret press that would fit my drill press.  Then I ran the bulk fret stock through my 'cheapo' home-made fret wire bender; cut it to length for each fret slot; pressed the wire in place; dressed the protruding ends with a file; finished the process with a fret file and steel wool, and voila, a completed fret board ready to be glued to the neck.

Whoa, gluing the fingerboard to the neck is a little more difficult than slapping one board on another and tossing a rock on it for weight.

The headstock is at an angle.  The back of the neck is rounded off.  The heel extends downward and is curved.

I need a new tool!  As you can see, I created a simple jig to hold the neck in place, while a sturdy board rests on the top of the fretboard for adjustable clamps to apply pressure without damaging the surface of the board. This took me all of thirty minutes to build from scrap stock laying around the shop gathering dust.  Damn, I like it when a plan comes together!

When the glue dries, I'll be ready to move on to the next phase of the acoustic dream.  Stay tuned for more progress.

Thursday, January 23, 2014

Another Acoustic Tool -- Part Five

I mentioned in the last post that I had completed gluing the body together and the next step would be cutting a channel in the top and back edges for adding binding (purfling).

I've learned that this process too can be done in a couple ways.  If I were a 'real' luthier, I might do this by hand with a homemade tool created from a broken saw blade, but that seems like it's not a simple procedure.  Remember, I said I like simple.  So, I chose to build a special router table, which would work a little easier for me.  This whole construction effort took about two hours and a few buck worth of scrap wood I had laying around collecting dust.  Geez, I love it when a plan comes together.


I surface mounted a small craft router under the top working surface near the edge so that the remaining open surface is where the guitar body will rest during the channel routing process.


The router blade can be moved up or down for precise adjustment in depth of the channel.

A special adjustable fence had to be fabricated to adjust the thickness of the channel into the side of the guitar.  We're not talking about a channel the size of the Grand Canyon, so the movement of the fence is minimal. The binding is slightly more than one-sixteenth-inch thick and about one-quarter-inch deep.

The body of the guitar will ride on the fence base up against the adjustable nose.  By carefully moving the body surface against the nose and perpendicular to the the router blade, the channel can be cut into the body with very little difficulty, so long as I pay attention to what I'm doing and don't get lost in some Muddy Water's blues trip evolving from the recesses of my mind.

More Acoustic Talk -- Part Four

This acoustic guitar building project has been a great learning experience.  I've created special tools, and I'm learning how to use them.  I've assembled odd shaped pieces and shaped some odd pieces.  I've learned that sound is greatly affected by the parts and pieces used in the delivery process.  And, I'm learning there is a helluva lot of thought, planning, effort, and meticulous work that goes into this hobby.  Perhaps someday, if I live long enough, I may be able to say I'm a novice luthier.

The top, back and side(s) assembly was the last thing I posted about, which was pretty straight forward, but also tedious, time consuming and a bit mind numbing.  If I screwed this up, the game would be over . . . but, I didn't.


When the sides, heel, and tail blocks are matched up and glued, the next step in the process is to add lining (kerf) to each of the side edges.  The lining is there for stability and for a surface on which to glue the top and back.  Kerf is a finely serrated piece of mahogany, which can be easily bent to conform to the shape of the guitar sides.  Yes, it takes thirty eight small spring clamps to properly hold tension on each surface during the gluing.


It's almost time for gluing top and back onto the sides, but small vertical spruce ribs need to be glued to the sides at the upper bout, waist, and lower bout to add just a little more stability to the guitar.


I've discovered several different ways with which to apply pressure to the top and back surfaces during the gluing process, and I created different tools for the purpose, but I chose the most simple process for me . . . I like simple.  I cut a sheet of one-quarter-inch ply (it's very flexible, but sturdy) in the shape of the body mold; drilled a series of corresponding holes in the sheet and the mold.  After dropping in the completed guitar sides, I applied glue to the kerf, smoothed it around evenly, and centered the top in position on the kerf.  It took a couple minutes for the glue to become tacky enough to carefully lay the sheet on the top surface without moving the top.  Once the sheet was down, I started adding screws to the holes in the sheet, and commenced to tighten then just enough in a criss-cross manner (I learned this years ago from my grandfather, when we were rebuilding the engine in my first hotrod), until all surfaces were tightly assembled together.  This was a little tricky in that the top has a very slight arch to it.  After the top was securely glued and allowed a 24-hour cure time, I did the same process for the back.   But, the back was more delicate, because it has a compound arch to its surface, which required a whole lot more attention to alignment and movement, and because of the shape, I allowed the glue to cure for 48 hours.  You can see from the photo above how the back required a great deal of surface pressure.  

These photos show the assembled body with the top and back glued in place on the sides. After allowing the glue to continue to cure for a couple days, the overlapping top (spruce) and back (rosewood) material was removed and the edges sanded in preparation for routing a channel in each surface for binding (purfling) to be glued in place.  

If I learn nothing else, I got the lingo down pat.  ;-) 

Saturday, January 18, 2014

Acoustic Progress -- Part Three

After leaping into the acoustic guitar building arena, there was ample activity in creating jigs and tools especially associated with the project.  I could have avoided this if I was lazy, incapable, or willing to spend money like a drunken sailor (oops, now I've just pissed off my military friends in the middle east, whom I've gifted with guitars and amps).  Commercially crafted tools are expensive, but no more useful than what I have had the enjoyment of creating, and lots of beer money left for me.

You've already seen some of the tools in a prior post, but here are a couple other shots of special stuff.

I've learned there are a couple ways to attach the top and back of the guitar to the finished sides, and one of those ways is to use clamps such as the one shown here.  It's a simple screw-type arrangement with cork-faced 1-1/2" x 3/4" wood blocks drilled to accommodate a 8-inch threaded 1/4" shaft with rubber pieces to protect the surface of the guitar. Washers and a wing nut completes the job.  The clamp is placed against the guitar side, when the glued top or back is in place, and the nut is tightened to apply pressure to the surface during the gluing process.  Pretty simple to build and use, and a lot less expensive than commercially available items that look and work the same.

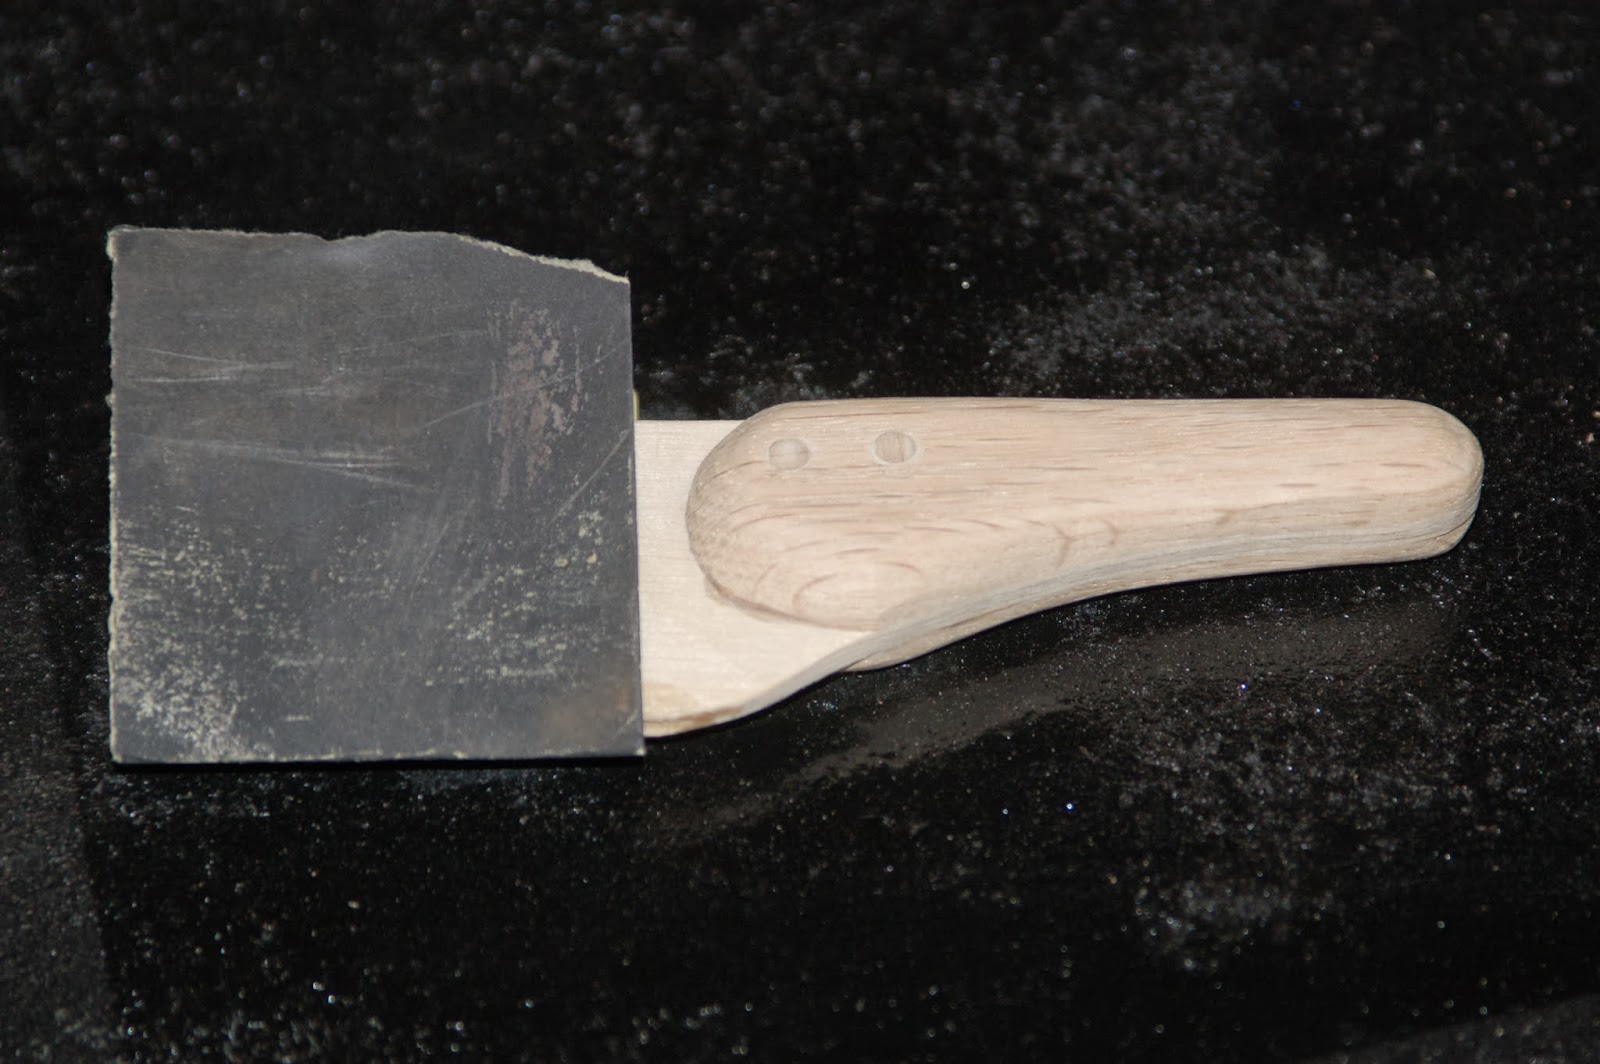
A cabinet scraper is another essential tool, but when you live in a place that has limited supply of specialty tools, it's sometimes easier (and more fun) to create your own. I used a paint scraper blade attached to a custom handle, and voila, a useful tool.

I've been diligent about taking progress photos along the way, so that if I undertake this process again, I'll have a leg up on the project.  And, it's nice to be able to sit back and admire what these old hands have been able to accomplish along the journey.


Shaping the top and finishing the rosette around the sound hole on the outside surface was the first step.


Then came bracing on the inside of the top.  I chose to replicate the Martin guitar pre-WWII scalloped bracing that was used on the D18s and D28s, because of the deep warm sound created from this arrangement.  This process required a whole lot of research, and thanks to the web and a few vintage book stores I was able to find plans and helpful information.

Bracing for the inside of the back is a little less involved from the standpoint of style, but there is one thing that makes this a bit complex.  The back must have a slight crown to it, so the bracing has to be cut to form that crown, which is dimensional from the center to the ends.  Thanks to great layout diagrams, this was a relatively easy process.  The center wood strip is there to stabilize the bookmatched surface of the the back, which like the top it is constructed from two pieces of material glued together on the edge.

Properly shaping and fitting the sides to the required dimensions is crucial to the overall design.  If I screw this up the top and back will not fit properly, and the neck will not join the body correctly.  Here's where the body jig comes into play.  The shaped sides are placed into the body mold and carefully positioned on 'center' with the mold, and any excess material is then marked and cut to fit.  Measure twice or three times, and cut once!  There is no gluing it back together to get it right.


When the sides fit perfectly, thanks to the help of the spreaders I built, the heel and tail blocks are glued in place.  Then the lining (kerf) is glued to the top and back inside edges of the sides, which is the surface on which the top and back are glued.


I'll post more photos with explanations as progress is made.  So far, so good!  I keep my fingers crossed so that anything unexpected is 'good'.


Saturday, December 28, 2013

Special Acoustic Guitar-Making Tools and Jigs -- Part Two

In a prior post concerning the acoustic guitar kit I received, I mentioned the need for special tools and jigs, and there are many.  I researched this extensively and discovered that anything I need can be purchased from a variety of sources, and if my pockets are deep enough, there is no problem.

Well, here's what I further understood.  Some tools and jigs are very simple in construction, but costly, so I decided to create my own, with the exception of a couple, which are more complex or made from materials I do not have at my exposure.  I'm fortunate to have a shop full of the basic woodworking and craft tools, and enough experience gained through past experiments to tackle the 'special' tool making endeavor, plus I simply get a rise out of creating my own stuff.

- 0 -

A body mold is essential.  It can be as simple as laminated cardboard pieces cut in the shape of the guitar body, or as complex as an item costing a hundred dollars or more.  Or, something in between for a lot less money.  I chose the middle ground, and spent about $12 on materials to build a mold that is hinged at the bottom and will close with a spring latch at the top, which will keep all the guitar surfaces in place during the building process.


- 0 -

The next items needed to shape the guitar body are spreaders that fit inside the mold to hold the sides in position, while being glued together, and while kerf ribbon is glued to the inside top and bottom of the sides. These simple devices can cost anywhere from $35-60 on the web, and that doesn't include shipping.  I made mine for about $3 a piece, using turnbuckles with eye bolts and scrap lumber I was going to toss out.

These spreaders are for the center inward angle of the body,
and for the bottom bout.  The spreader for the upper bout
(which I still need to build) is similar to the bottom, only shorter.

This spreader is used when gluing the neck and end blocks 
in place at the top and bottom of the guitar.

- 0 -

Cam clamps of various description are needed in special circumstances and they too can be purchased, if you don't mind coughing up $19-35 plus shipping each for simple devices like the ones I created for less than $2.50 each in materials.

The upper clamp arm slides on the metal shaft, and the cam lever tensioner can be
adjusted to hold things securely in place during the gluing process.

- 0 -

A special clamping caul is essential when gluing a bridge to the top surface of the guitar, due to the uneven surface of the bridge.  So, for about $1.20 and a piece of scrap wood stock and a small piece of sheet cork, I built a custom piece that would cost $60+ from a supplier.

The clamp is centered on the bridge and held in place through the sound hole
by one of the adjustable clamps pictured above.  Then the screws on either end 
are adjusted to hold the ends of the bridge firmly to the body during the gluing process.

- 0 -

Another nifty little item is a homemade fret dresser, which is simply a sheet of eighth-inch ply with laminated and shaped pieces for a handle.  The straight edge of the ply is grooved to fit the contour of a fret.  A small piece of very fine sand paper is wrapped over the leading edge of the tool and rubbed carefully on the frets to dress down any sharp or uneven edges.  Cost to make $0.


- 0 -

Saddles are the bone (or other material) pieces on the top of the bridge, which hold the strings off the fingerboard and guide them at the proper angle along the neck.  Usually, the saddle top edge is slightly rounded over, which can be a simple task or a little more difficult.  I like simple, so I created a little tool out of a dull box cutter knife blade.  I cut a thin slot in a piece of scrap oak, inserted the blade sharp-side down in the slot, and voila, the rounded adjustment slots on the blade can be used to round over the saddle stock., by sliding it along the saddle.  Cost to make $0.  Cost to buy, I don't know, 'cause I've not seen one on the market.


- 0 -

And, this jig is for applying tension to bracing material on the inside of the top and bottom surfaces of the guitar. I suppose a combination of books, bricks, or Weider weights could be used to hold the bracing in place, but again I like a simpler approach, even if it requires a little thought, exploration, or piracy of an idea. The jig shown here has a bottom deck and top surface which is slightly larger than a guitar body.  The two surfaces are separated by about 20 inches with a dowel on each corner, which is secured in place with screws.  The guitar top is placed on the bottom jig surface; finished bracing is glued and applied to prearranged locations on the guitar surface; and long, thin dowels are placed on the bracing and wedged under tension against the top surface of the jig to apply uniform pressure to the bracing during the drying process, which holds everything in place to ensure a sold glue job.   Cost to build about $30.  Cost to buy $450+ at your favorite luthier supply store.


Friday, December 27, 2013

I Made The Acoustic Leap! -- Part One

To me there is a giant crevasse on the journey of making cigar box guitars and transitioning to dreadnaught acoustics, but I made the leap.  Nearly four years to the day since creating my first CBG, I received a Martin 14-fret dreadnaught kit for Christmas.


Needless to say, I am very pleased with the gift, but I'm also paranoid about screwing up the makings of a really cool guitar, to say nothing about the expense associated with this experiment.  But, I'll do my best to create something worthy of melody making, and if the past is any indication of the future, things will go well.

It is a D size guitar made of solid East Indian Rosewood back and sides, and solid Sitka spruce top. The grain and color of the sides match the 'book matched' back perfectly.  And, the two pieces of the Sitka spruce top are so well matched that you cannot tell where they are joined in the middle. But, that's why Martin guitars are some of the finest in the world, and it seems their kits are of the same quality as their finished guitars.

The  25.4" scale mahogany neck with rosewood headstock veneer comes with a truss rod to fit the channel, and unfretted rosewood fingerboard, which is slotted and radiused, and position markers are pre-drilled.

The kit also comes with rosewood bridge and bridge plate; tortoise pick guard; dovetail mortise and tenon neck block; end block; traditional 5/16" X-pattern spruce top bracing blanks; spruce back brace blanks; binding; purfling; bone nut and saddle blanks; and medium gauge fret wire.

The kit is great!  But, there are a few things that need attention before commencing with the build.

TOOLS and JIGS!  Yes, there are numerous special tools needed.  And, there are choices to make -- buy or build?  Or, both?

I chose the latter, with a bunch of 'build' tossed in, and I'll post photos soon of the tools I built, which will bring this kit to life.

But, in the meantime, I plan to read the plans several times, and to familiarize myself with all the nuances of building a full size acoustic guitar from nearly scratch.  My plan is to replicate the pre-war Martin D-18 guitar, which is one of the finest sounding instruments ever made (in my opinion).

I'll keep you posted throughout the building process.


Sunday, December 15, 2013

'el Jefe'

I picked up the last oak neck I had in the inventory, looked it over, and thought, 'what am I going to do with this?'  A Padron cigar box was lying in the corner groaning for attention, so I decided to match the two up.

'el Jefe' is a three-string electro/acoustic 25.4-inch cigar box guitar with scarf joint ebony laminate headstock, and zebrawood 22-fret fingerboard.  The Corian nut is followed by a brass drawer pull I converted to a bridge and saddle.  The A-D-G strings from a standard acoustic set ride over a very 'hot' hand wound TotalRojo magnetic pickup, from the open gear tuners to the custom tailstock.  It's tuned to open G (G-D-g).

I like the Padron box because of the acoustic quality derived from the thin laminated top, which lets sound bounce around quite well through the three screen-backed sound holes.  Amp up this monster and the doors blow down -- seriously, with the gain set at two, and volume at four, this 'big man' scorches.

To add window dressing to the box, I chose to design corner pieces from thin walnut stock.  And, the logo, which is a standard headstock item, is relocated to the body for a little change in atmosphere.


Saturday, December 7, 2013

'The Lion' In Winter

I most nearly froze my butt this morning shooting photos of 'The Lion', which is the most recent creation coming out of my shop.

Although, the temperature here in Mansfield, OH was about 28 degrees (that's above zero) with a slight wind blowing, it is nothing like where I grew up.  Temperature in Great Falls, Montana this morning was a balmy -24 degrees (raw temp with no listed wind chill, but I know from experience the wind was blowing - it always blows - hard), while the temp in central Antarctica was a mere -22 degrees.  Yes, folks, it gets very chilly on the central plains of the Big Sky Country.

'The Lion' is a three-string electro/acoustic guitar with oak scarf joint neck and 20-fret chakte kok fingerboard, TotalRojo hand wound pickup and bridge.  The nut is hand shaped from Corian and the saddle is an old skeleton key I found hiding in the cluttered recesses of my tool box.  The exposed tailpiece is a laminated cherry-maple-cherry item, and the tuners are closed gear.  The body is a Totalmenta a mano cigar box from Esteli, Nicaragua. Five coats of poly make the neck and body as slick and glossy as an ice rink.


Acoustic resonance is quite good for a small body, which I attribute to the thin Spanish cedar laminated top and star-shaped sound holes.  The pickup located close to the bridge give the guitar a warm and mellow sound, but it is not to be confused with weak, 'cause that ain't the case.  'The Lion' roars, when plugged into an amp.

Monday, December 2, 2013

Pup Tester

Testing the magnetic pickups (pups) I've been making has been a pain in the butt, because I have been lazy and not created a method by which it could be easier.  I would wind the pup, attach lead wires from the pup to an output jack, fiddle around holding the jack to plug in an amp cord.  If I discovered a problem, I would need to unsolder  the leads, before I could proceed.

So, today I decided to build a pup tester, which eliminates the useless fooling around.

This photo is of the basic test platform with pup leads attached to 'ground' and 'positive' alligator clips near the bridge. (The pup is a creation from my friend Roger Berry, who taught me what I know about winding pickups, but not everything he knows ;-).

Leads from the clips are routed through the surface of the enclosure to the output jack, where the amp cord is inserted.

The dark lines on the test surface are the location markers for the pups in neck, mid, or bridge positions on a guitar, which produce different sound in each position.

The chrome bridge is a leftover item that I no longer had use for on a regular build, so it came in handy  here.

I decided to keep it as sanitary and simple as possible, and to make this tester in the shape of a guitar (you need to use your imagination here) with a standard 25.4-inch scale.  It has only base and treble strings, but that all I need to determine if the pup is working correctly and to hear how it sounds in operation.


 I'm using one of the CBAmps I build for the test.  It's a 9-volt battery
operated GuitarFuel harness with multiple output options, 
and it blows sound around big time.

Sunday, December 1, 2013

'Romeo'

'Romeo' is a four-string electric guitar created from a
Romeo y Julieta cigar box.

The box construction does not facilitate making it an acoustic, because of the thickness of all surfaces (about 3/8" thick on the sides, and the top is made from a pressed material, not wood).

The scarf joint neck is handcrafted from a stick of cherry with a Zebrawood fingerboard.

Open-gear tuners draw the strings, which are recessed inside the box, across a Corian saddle, hand set frets, and Corian nut.

The magnetic pickup is set into the top about midway between the neck and saddle, which produces a warm and mellow sound, while retaining richness to the treble side of play. To maintain a clean appearance, I covered the pup top and painted it white to match the top.

The box itself, in its original state, has such a smooth and glossy finish, I had to be really careful not to screw it up in the building process . . . I succeeded.  I really like the clean, unobstructed overall appearance of the guitar, and it sounds good, too.

To enhance the Romeo & Julieta theme, I added a few illustrations to the inside.